You’ve recorded an interview with a filmmaker about their new short. The guest gives a terrific answer about the ending. But on playback, their face disappears into shadow. The camera shakily lurches forward when leaning. And the look of the picture is softer than what it originally was on your phone.
The conversation gets interfered with by those distractions. The first step to improving the quality of a video is how it is captured and handled by the entertainment creator. There’s a place for software at the end. But only if you set it a certain visual challenge. How can that workflow go without going to the trouble of converting an interview into an all-day production? Here it is.
Set up the shot before the conversation
Put useful light on the speaker
Have your guest sit close to a window. Daylight should be falling across their face (not from behind). If harsh patching happens due to direct sun, move out of the path of the sun or cover with a sheer curtain. Use a diffused light or a video light near the camera in interior lighting at night.
Note the glistening areas on the forehead and cheeks. If they are blank white patches they need to be cut in exposure prior to recording. Be sure to look for mixed lighting, too. Opposite sides of a face can have different colors due to a warm ceiling bulb and cool daylight. If possible, turn off the competing source. A depressing background is okay. However, an expression that cannot be read isn’t good.
Keep the camera and framing settled
Securely attach phone or camera at close to eye level. If the interview is to be done at a sitting position, a tripod eliminates the minute adjustments that happen when someone holds a device throughout a conversation. All you need to do is ensure it’s not supported by a table where someone may put their foot.
Allow space for spontaneous movements. Also, determine the vertical or horizontal composition of the main destination. Record a brief rehearsal during a guest’s speech and movement. Check that the camera keeps the guest in focus when they lean back. Does your camera have any focus and/or exposure lock option? Use only after checking the position and lighting for talking.
Bring the clean source into your edit
Transfer the camera’s original file to your working folder. Ask a remote contributor for their locally recorded version, where available. No need of a copy downloaded from a social post. Messaging services and repeated lossy exports can discard detail before you even begin.
Have an untouched copy in a separate backup location. Always have different names for working edit and delivery version. So when a change later seems amiss, you will have a solid reference point.
Choose the strongest take before processing anything. Note the exact passage you plan to use. Leave a little material around its boundaries for editing. If the guest’s eyes are badly out of focus throughout an easily repeated answer, recording that passage again may be more dependable.
Where Video Enhancer fits in the workflow
Once you’ve selected footage, Designkit offers AI video tools, say Video Enhancer for working on an existing recording. Remember, generating a new video, introducing captions, and editing audio are not the same things. So, keep those jobs outside this visual cleanup step.
If the video that has been selected for an interview has noise, mild softness, or compression artifacts, you can make use of Video Enhancer to improve video quality. Enhancement may reduce those issues, while upscaling increases the output resolution. Upload and browse the enhancements available to you, and preview the result before downloading it. Compare the product with your defect. A higher resolution label doesn’t always make for a better picture.
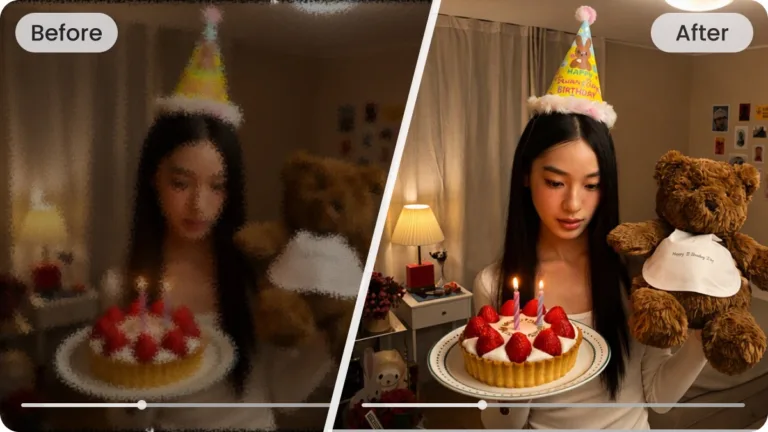
Designkit’s official illustration of brightening an underexposed indoor recording. Source: Designkit Video Enhancer feature page.
Have realistic expectations. AI reconstruction can estimate detail. Therefore, a more defined face doesn’t guarantee that every feature matches what the camera originally captured. For an interview, recognizable appearance is more important than an aggressively polished finish. You should think of the processed version as a candidate for review. Not an automatic replacement.
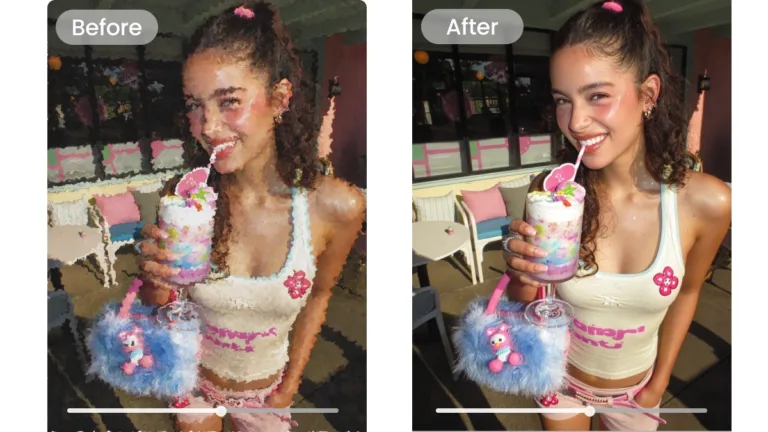
Designkit’s official before-and-after example of reducing compression artifacts. Source: Designkit Video Enhancer feature page. Product illustration.
Review faces and details through the whole clip
Match ‘like for like’ moments at the same display size. It may not be fair to scale up one version beyond the other. Then, play the passage at normal speed. A flattering paused frame provides very little information on what’s going on between the expressions.
- Faces: Pay attention to the guest’s eyes, teeth, hairline, as well as skin texture while they speak. Look for features that change shape, waxy patches, or detail that flickers between frames. A natural blink should be a natural blink.
- Text: Examine any lettering that has already been captured in the scene. Such as a name badge or film title on a poster. Check the actual characters. A crisp-looking word can still be incorrect, and this is specifically true when the source was difficult to read.
- Moving objects: Watch hands crossing the face, glasses being adjusted, and objects entering the frame. Notice doubled edges, trails, or textures that seem to swim. These moments should be given more attention than an empty background.
If there is a distraction, then throw that version away or select another one that is available. Don’t re-process an already processed export just to obtain the certainty of the export being fixed on the subsequent processing.
Prepare the version your audience will watch
After you accept the picture, assemble the final cut. Recheck the crop so that the guest’s face and indispensable information are comfortably framed for the intended format. Platform controls can cover parts of the image. Hence, you should inspect the posting preview too.
Use the destination’s current export guidance. When it comes to YouTube, keep the recorded frame rate. Its upload recommendations advise this. Watch the finished file on a phone as well as your editing display. Furthermore, review the platform’s processed version when available.
Last but not least, choose a thumbnail that shows the discussion and decide whether the description needs a spoiler warning. Your guest’s best observation justifies the right introduction. Make that editorial choice deliberately before you press Share.

Thomas Miller is the founder and Editor-in-Chief of Seat42F, covering television, movies and streaming entertainment. He launched Seat42F in 2007 and has spent nearly two decades covering the entertainment industry.